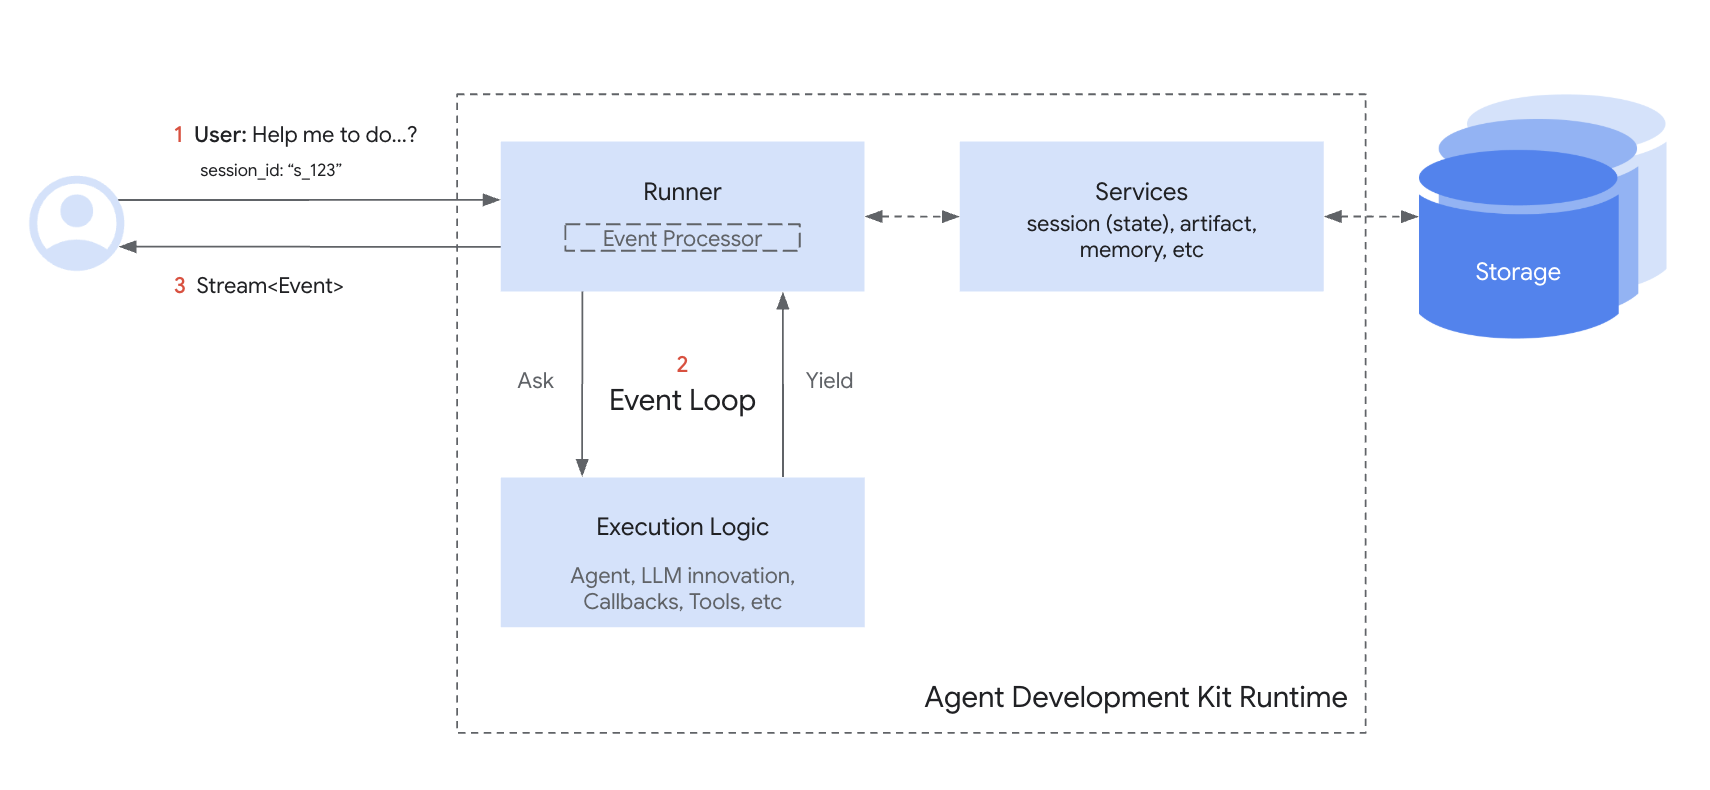
Session:跟踪个别对话
在前述介绍之后,让我们深入了解 Session。回想一下“对话线程”的概念。就像你不会每次发短信都从头开始一样,智能体也需要了解当前交互的上下文。Session 是 ADK 专门设计用于跟踪和管理这些单独对话线程的对象。
Session 对象
当用户开始与你的智能体交互时,SessionService 会创建一个 Session 对象(google.adk.sessions.Session)。该对象作为单个对话线程相关所有内容的容器。其主要属性如下:
- Identification (
id,appName,userId): Unique labels for the conversation.id: A unique identifier for this specific conversation thread, essential for retrieving it later. A SessionService object can handle multipleSession(s). This field identifies which particular session object are we referring to. For example, "test_id_modification".app_name: Identifies which agent application this conversation belongs to. For example, "id_modifier_workflow".userId: Links the conversation to a particular user.
- History (
events): A chronological sequence of all interactions (Eventobjects – user messages, agent responses, tool actions) that have occurred within this specific thread. - Session State (
state): A place to store temporary data relevant only to this specific, ongoing conversation. This acts as a scratchpad for the agent during the interaction. We will cover how to use and managestatein detail in the next section. - Activity Tracking (
lastUpdateTime): A timestamp indicating the last time an event occurred in this conversation thread.
示例:检查 Session 属性
 from google.adk.sessions import InMemorySessionService, Session

 # 创建一个简单的 session 以检查其属性
 temp_service = InMemorySessionService()
 example_session = await temp_service.create_session(
     app_name="my_app",
     user_id="example_user",
     state={"initial_key": "initial_value"} # 可以初始化 state
 )

 print(f"--- 检查 Session 属性 ---")
 print(f"ID (`id`):                {example_session.id}")
 print(f"应用名 (`app_name`): {example_session.app_name}")
 print(f"用户 ID (`user_id`):         {example_session.user_id}")
 print(f"状态 (`state`):           {example_session.state}") # 这里只显示初始状态
 print(f"事件 (`events`):         {example_session.events}") # 初始为空
 print(f"最后更新时间 (`last_update_time`): {example_session.last_update_time:.2f}")
 print(f"---------------------------------")

 # 清理(本例可选)
 temp_service = await temp_service.delete_session(app_name=example_session.app_name,
                             user_id=example_session.user_id, session_id=example_session.id)
 print("temp_service 的最终状态 - ", temp_service)
 import com.google.adk.sessions.InMemorySessionService;
 import com.google.adk.sessions.Session;
 import java.util.concurrent.ConcurrentMap;
 import java.util.concurrent.ConcurrentHashMap;

 String sessionId = "123";
 String appName = "example-app"; // 示例 app 名称
 String userId = "example-user"; // 示例用户 id
 ConcurrentMap<String, Object> initialState = new ConcurrentHashMap<>(Map.of("newKey", "newValue"));
 InMemorySessionService exampleSessionService = new InMemorySessionService();

 // 创建 Session
 Session exampleSession = exampleSessionService.createSession(
     appName, userId, initialState, Optional.of(sessionId)).blockingGet();
 System.out.println("Session 创建成功。");

 System.out.println("--- 检查 Session 属性 ---");
 System.out.printf("ID (`id`): %s%n", exampleSession.id());
 System.out.printf("应用名 (`appName`): %s%n", exampleSession.appName());
 System.out.printf("用户 ID (`userId`): %s%n", exampleSession.userId());
 System.out.printf("状态 (`state`): %s%n", exampleSession.state());
 System.out.println("------------------------------------");


 // 清理(本例可选)
 var unused = exampleSessionService.deleteSession(appName, userId, sessionId);
(注意: 上述 state 仅为初始状态。状态更新通过事件完成,详见 State 章节。)
使用 SessionService 管理会话
如上所示,你通常不会直接创建或管理 Session 对象,而是通过 SessionService。该服务作为会话生命周期的中央管理者。
其核心职责包括:
- 开启新对话: 当用户开始交互时,创建新的
Session对象。 - 恢复已有对话: 通过 ID 检索特定
Session,让智能体可以从上次中断处继续。 - 保存进度: 将新的交互(
Event对象)追加到 session 历史。这也是 sessionstate更新的机制(详见State章节)。 - 列出对话: 查找特定用户和应用的活跃会话线程。
- 清理: 当对话结束或不再需要时,删除
Session及其相关数据。
SessionService 实现
ADK 提供了多种 SessionService 实现,你可以选择最适合需求的存储后端:
-
InMemorySessionService- 工作方式: 直接将所有 session 数据存储在应用内存中。
- 持久性: 无。应用重启后所有对话数据都会丢失。
- 依赖: 无需额外配置。
- 适用场景: 快速开发、本地测试、示例,以及不需要长期持久化的场景。
-
VertexAiSessionService- 工作方式: 通过 API 调用使用 Google Cloud 的 Vertex AI 基础设施进行 session 管理。
- 持久性: 有。数据通过 Vertex AI Agent Engine 可靠且可扩展地管理。
- 依赖:
- 适用场景: 部署在 Google Cloud 上、需与 Vertex AI 其他功能集成的可扩展生产应用。
# 依赖:pip install google-adk[vertexai]
# 以及 GCP 配置和认证
from google.adk.sessions import VertexAiSessionService

PROJECT_ID = "your-gcp-project-id"
LOCATION = "us-central1"
# 与该服务配合使用的 app_name 应为 Reasoning Engine ID 或名称
REASONING_ENGINE_APP_NAME = "projects/your-gcp-project-id/locations/us-central1/reasoningEngines/your-engine-id"

session_service = VertexAiSessionService(project=PROJECT_ID, location=LOCATION)
# 调用服务方法时使用 REASONING_ENGINE_APP_NAME,例如:
# session_service = await session_service.create_session(app_name=REASONING_ENGINE_APP_NAME, ...)
// 请参考上方依赖要求,并在 bashrc 文件中导出以下环境变量: // export GOOGLE_CLOUD_PROJECT=my_gcp_project // export GOOGLE_CLOUD_LOCATION=us-central1 // export GOOGLE_API_KEY=my_api_key import com.google.adk.sessions.VertexAiSessionService; import java.util.UUID; String sessionId = UUID.randomUUID().toString(); String reasoningEngineAppName = "123456789"; String userId = "u_123"; // 示例用户 id ConcurrentMap<String, Object> initialState = new ConcurrentHashMap<>(); // 本例无需初始 state VertexAiSessionService sessionService = new VertexAiSessionService(); Session mySession = sessionService .createSession(reasoningEngineAppName, userId, initialState, Optional.of(sessionId)) .blockingGet(); -
DatabaseSessionService- 工作方式: 连接到关系型数据库(如 PostgreSQL、MySQL、SQLite),将 session 数据持久化存储在表中。
- 持久性: 有。数据可在应用重启后保留。
- 依赖: 已配置的数据库。
- 适用场景: 需要你自行管理的可靠持久存储的应用。
选择合适的 SessionService 是决定智能体对话历史和临时数据如何存储与持久化的关键。
Session 生命周期

以下是 Session 与 SessionService 在一次对话轮次中协作的简化流程:
- 启动或恢复: 应用的
Runner使用SessionService执行create_session(新对话)或get_session(检索已有对话)。 - 提供上下文:
Runner通过服务方法获取合适的Session对象,为智能体提供对应 Session 的state和events访问。 - 智能体处理: 用户向智能体发起查询。智能体分析查询,并可能结合 session 的
state和events历史来决定响应。 - 响应与状态更新: 智能体生成响应(并可能标记需在
state中更新的数据)。Runner将其打包为Event。 - 保存交互:
Runner调用sessionService.append_event(session, event),将session和新event作为参数。服务会将Event添加到历史,并根据事件中的信息更新 session 的state。session 的last_update_time也会更新。 - 准备下一轮: 智能体响应发送给用户。更新后的
Session由SessionService存储,准备好下一个轮次(通常在当前 session 中继续对话,从第 1 步重新开始)。 - 结束对话: 对话结束时,如不再需要,可调用
sessionService.delete_session(...)清理存储的 session 数据。
此循环突出显示了 SessionService 如何通过管理每个 Session 对象的历史和状态,确保对话的连续性。
