ADK Kotlin 快速入门
本指南展示如何开始使用 Kotlin 的 Agent Development Kit (ADK)。开始之前,请确保你已安装了以下软件:
- Java 17 或更高版本
- Gradle 8.0 或更高版本
正在开发 Android 应用?
本快速入门介绍 JVM 上的 Kotlin。如果你正在构建 Android 应用,请先完成本快速入门以了解智能体 API,然后参阅为 Android 构建 ADK 智能体了解 Android 特有的项目设置和端侧模型。
创建智能体项目
创建一个包含以下文件和目录结构的智能体项目:
my_agent/
    src/main/kotlin/com/example/agent/
                        HelloTimeAgent.kt   # agent definition + tool
                        Main.kt             # entry point
    build.gradle.kts                        # project configuration
    .env                                    # API keys or project IDs
使用命令行创建此项目结构
定义智能体代码
创建一个基础智能体的代码,包括一个简单的 ADK 函数工具实现,名为 getCurrentTime()。将以下代码添加到你的项目目录中的 HelloTimeAgent.kt 文件:
package com.example.agent

import com.google.adk.kt.agents.Instruction
import com.google.adk.kt.agents.LlmAgent
import com.google.adk.kt.annotations.Param
import com.google.adk.kt.annotations.Tool
import com.google.adk.kt.models.Gemini

class TimeService {
    /** 模拟工具实现 */
    @Tool
    fun getCurrentTime(
        @Param("要获取时间的城市名称") city: String
    ): Map<String, String> {
        return mapOf("city" to city, "time" to "现在是上午 10:30。")
    }
}

object HelloTimeAgent {
    @JvmField
    val rootAgent = LlmAgent(
        name = "hello_time_agent",
        description = "报告指定城市的当前时间。",
        model = Gemini(
            name = "gemini-flash-latest",
            apiKey = System.getenv("GOOGLE_API_KEY")
                ?: error("未设置 GOOGLE_API_KEY 环境变量。"),
        ),
        instruction = Instruction(
            "你是一个有用的助手,可以报告城市的当前时间。"
                + "使用 'getCurrentTime' 工具来实现。"
        ),
        tools = TimeService().generatedTools(),
    )
}
关于 @Tool 和 KSP
@Tool 注解将函数标记为智能体可以调用的工具。在编译时,KSP(Kotlin 符号处理)注解处理器会生成上面使用的 .generatedTools() 扩展函数。这是一种无反射的函数工具注册方式。所需的 KSP 插件和处理器依赖已包含在下面的 build.gradle.kts 配置中。
配置项目和依赖项
一个 ADK Kotlin 智能体项目需要在你的 build.gradle.kts 项目文件中添加以下依赖:
dependencies {
    implementation("com.google.adk:google-adk-kotlin-core:0.2.0")
    ksp("com.google.adk:google-adk-kotlin-processor:0.2.0")
}
项目的完整 build.gradle.kts 配置
以下代码显示了此项目的完整 build.gradle.kts 配置:
plugins {
    kotlin("jvm") version "2.1.20"
    id("com.google.devtools.ksp") version "2.1.20-2.0.1"
    application
}

repositories {
    mavenCentral()
}

dependencies {
    implementation("com.google.adk:google-adk-kotlin-core:0.2.0")
    implementation("com.google.adk:google-adk-kotlin-webserver:0.2.0")
    ksp("com.google.adk:google-adk-kotlin-processor:0.2.0")
}

kotlin {
    jvmToolchain(17)
}

application {
    mainClass.set(
        project.findProperty("mainClass") as? String
            ?: "com.example.agent.MainKt"
    )
}

tasks.named<JavaExec>("run") {
    standardInput = System.`in`
}
设置你的 API 密钥
此项目使用需要 API 密钥的 Gemini API。如果你还没有 Gemini API 密钥,请在 Google AI Studio 的 API 密钥 页面创建一个。
在终端窗口中,将你的 API 密钥写入项目的 .env 文件以设置环境变量:
在 ADK 中使用其他 AI 模型
ADK 支持使用多种生成式 AI 模型。有关在 ADK 智能体中配置其他模型的更多信息,请参阅模型与身份验证。
创建入口点
创建一个 Main.kt 文件,以便从命令行运行并与 HelloTimeAgent 交互。ReplRunner 提供了一个内置的交互式 REPL,用于处理用户输入、智能体响应和工具确认提示。
package com.example.agent

import com.google.adk.kt.runners.ReplRunner

fun main() {
    ReplRunner(HelloTimeAgent.rootAgent).start()
}
运行你的智能体
你可以使用交互式命令行 REPL 或 ADK 提供的 AdkWebServer 网页用户界面来运行你的 ADK 智能体。这两个选项都允许你测试智能体并与之交互。
使用命令行界面运行
使用 Gradle run 任务通过命令行界面运行你的智能体:
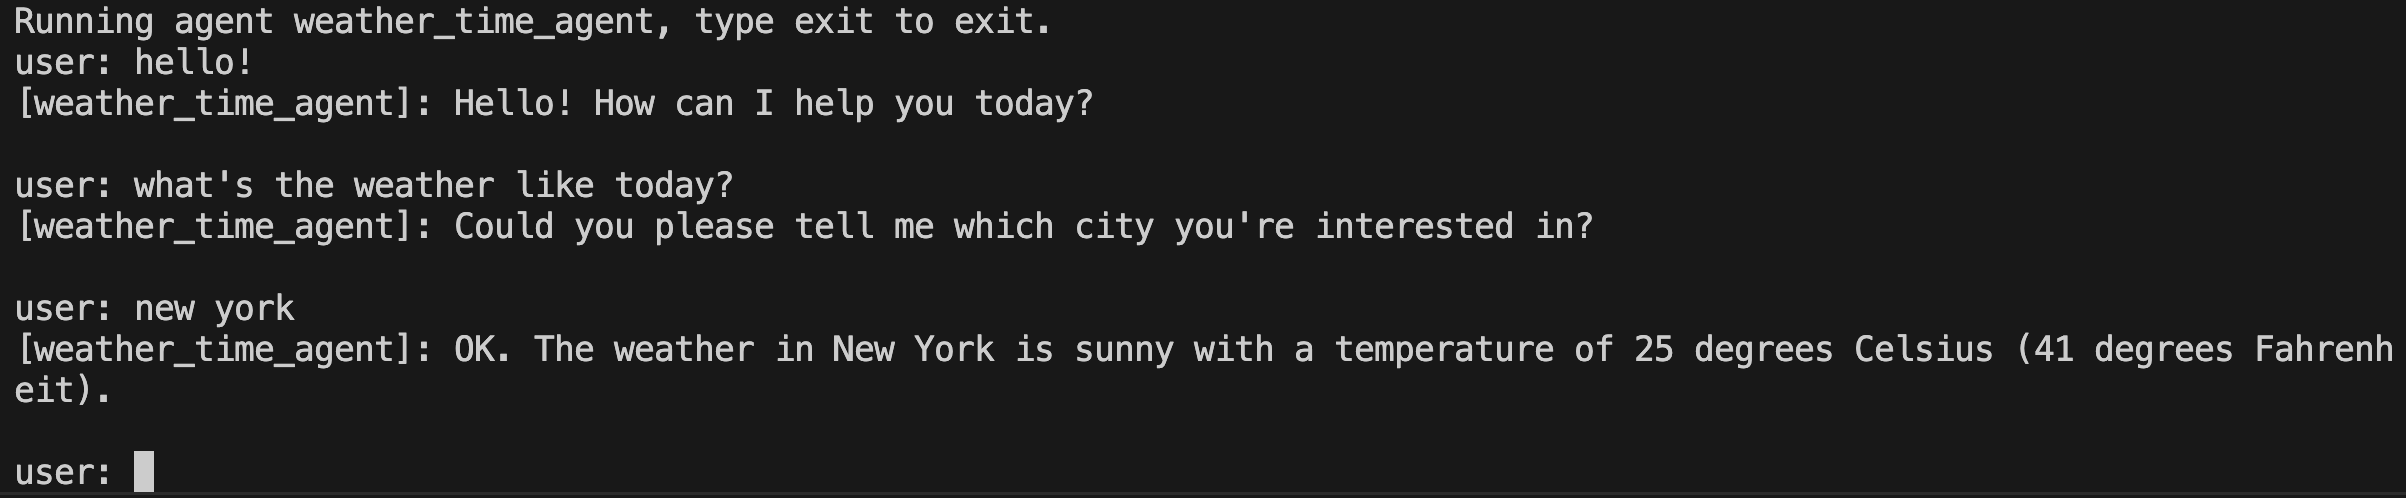
智能体启动一个交互式会话。输入消息并按回车键:
Agent hello_time_agent is ready. Type 'exit' to quit.

You > What time is it in New York?

hello_time_agent > The current time in New York is 10:30am.

You > exit
Exiting agent.
使用网页界面运行
要使用 ADK 网页界面运行你的智能体,请将 webserver 依赖添加到你的 build.gradle.kts:
dependencies {
    implementation("com.google.adk:google-adk-kotlin-core:0.2.0")
    implementation("com.google.adk:google-adk-kotlin-webserver:0.2.0")
    ksp("com.google.adk:google-adk-kotlin-processor:0.2.0")
}
然后创建一个 WebMain.kt 文件,与你的 Main.kt 放在一起:
package com.example.agent

import com.google.adk.kt.artifacts.InMemoryArtifactService
import com.google.adk.kt.sessions.InMemorySessionService
import com.google.adk.kt.webserver.AdkWebServer
import com.google.adk.kt.webserver.loaders.SingleAgentLoader
import com.google.adk.kt.webserver.telemetry.ApiServerSpanExporter

fun main() {
    val agent = HelloTimeAgent.rootAgent
    val sessionService = InMemorySessionService()
    val artifactService = InMemoryArtifactService()

    val server = AdkWebServer(
        port = 8080,
        sessionService = sessionService,
        artifactService = artifactService,
        agentLoader = SingleAgentLoader(agent),
        apiServerSpanExporter = ApiServerSpanExporter(),
    )

    println("正在启动 ADK 网页服务器,地址为 http://localhost:8080...")
    server.start(wait = true)
}
使用 -PmainClass 属性运行 Web 服务器以选择 Web 入口点:
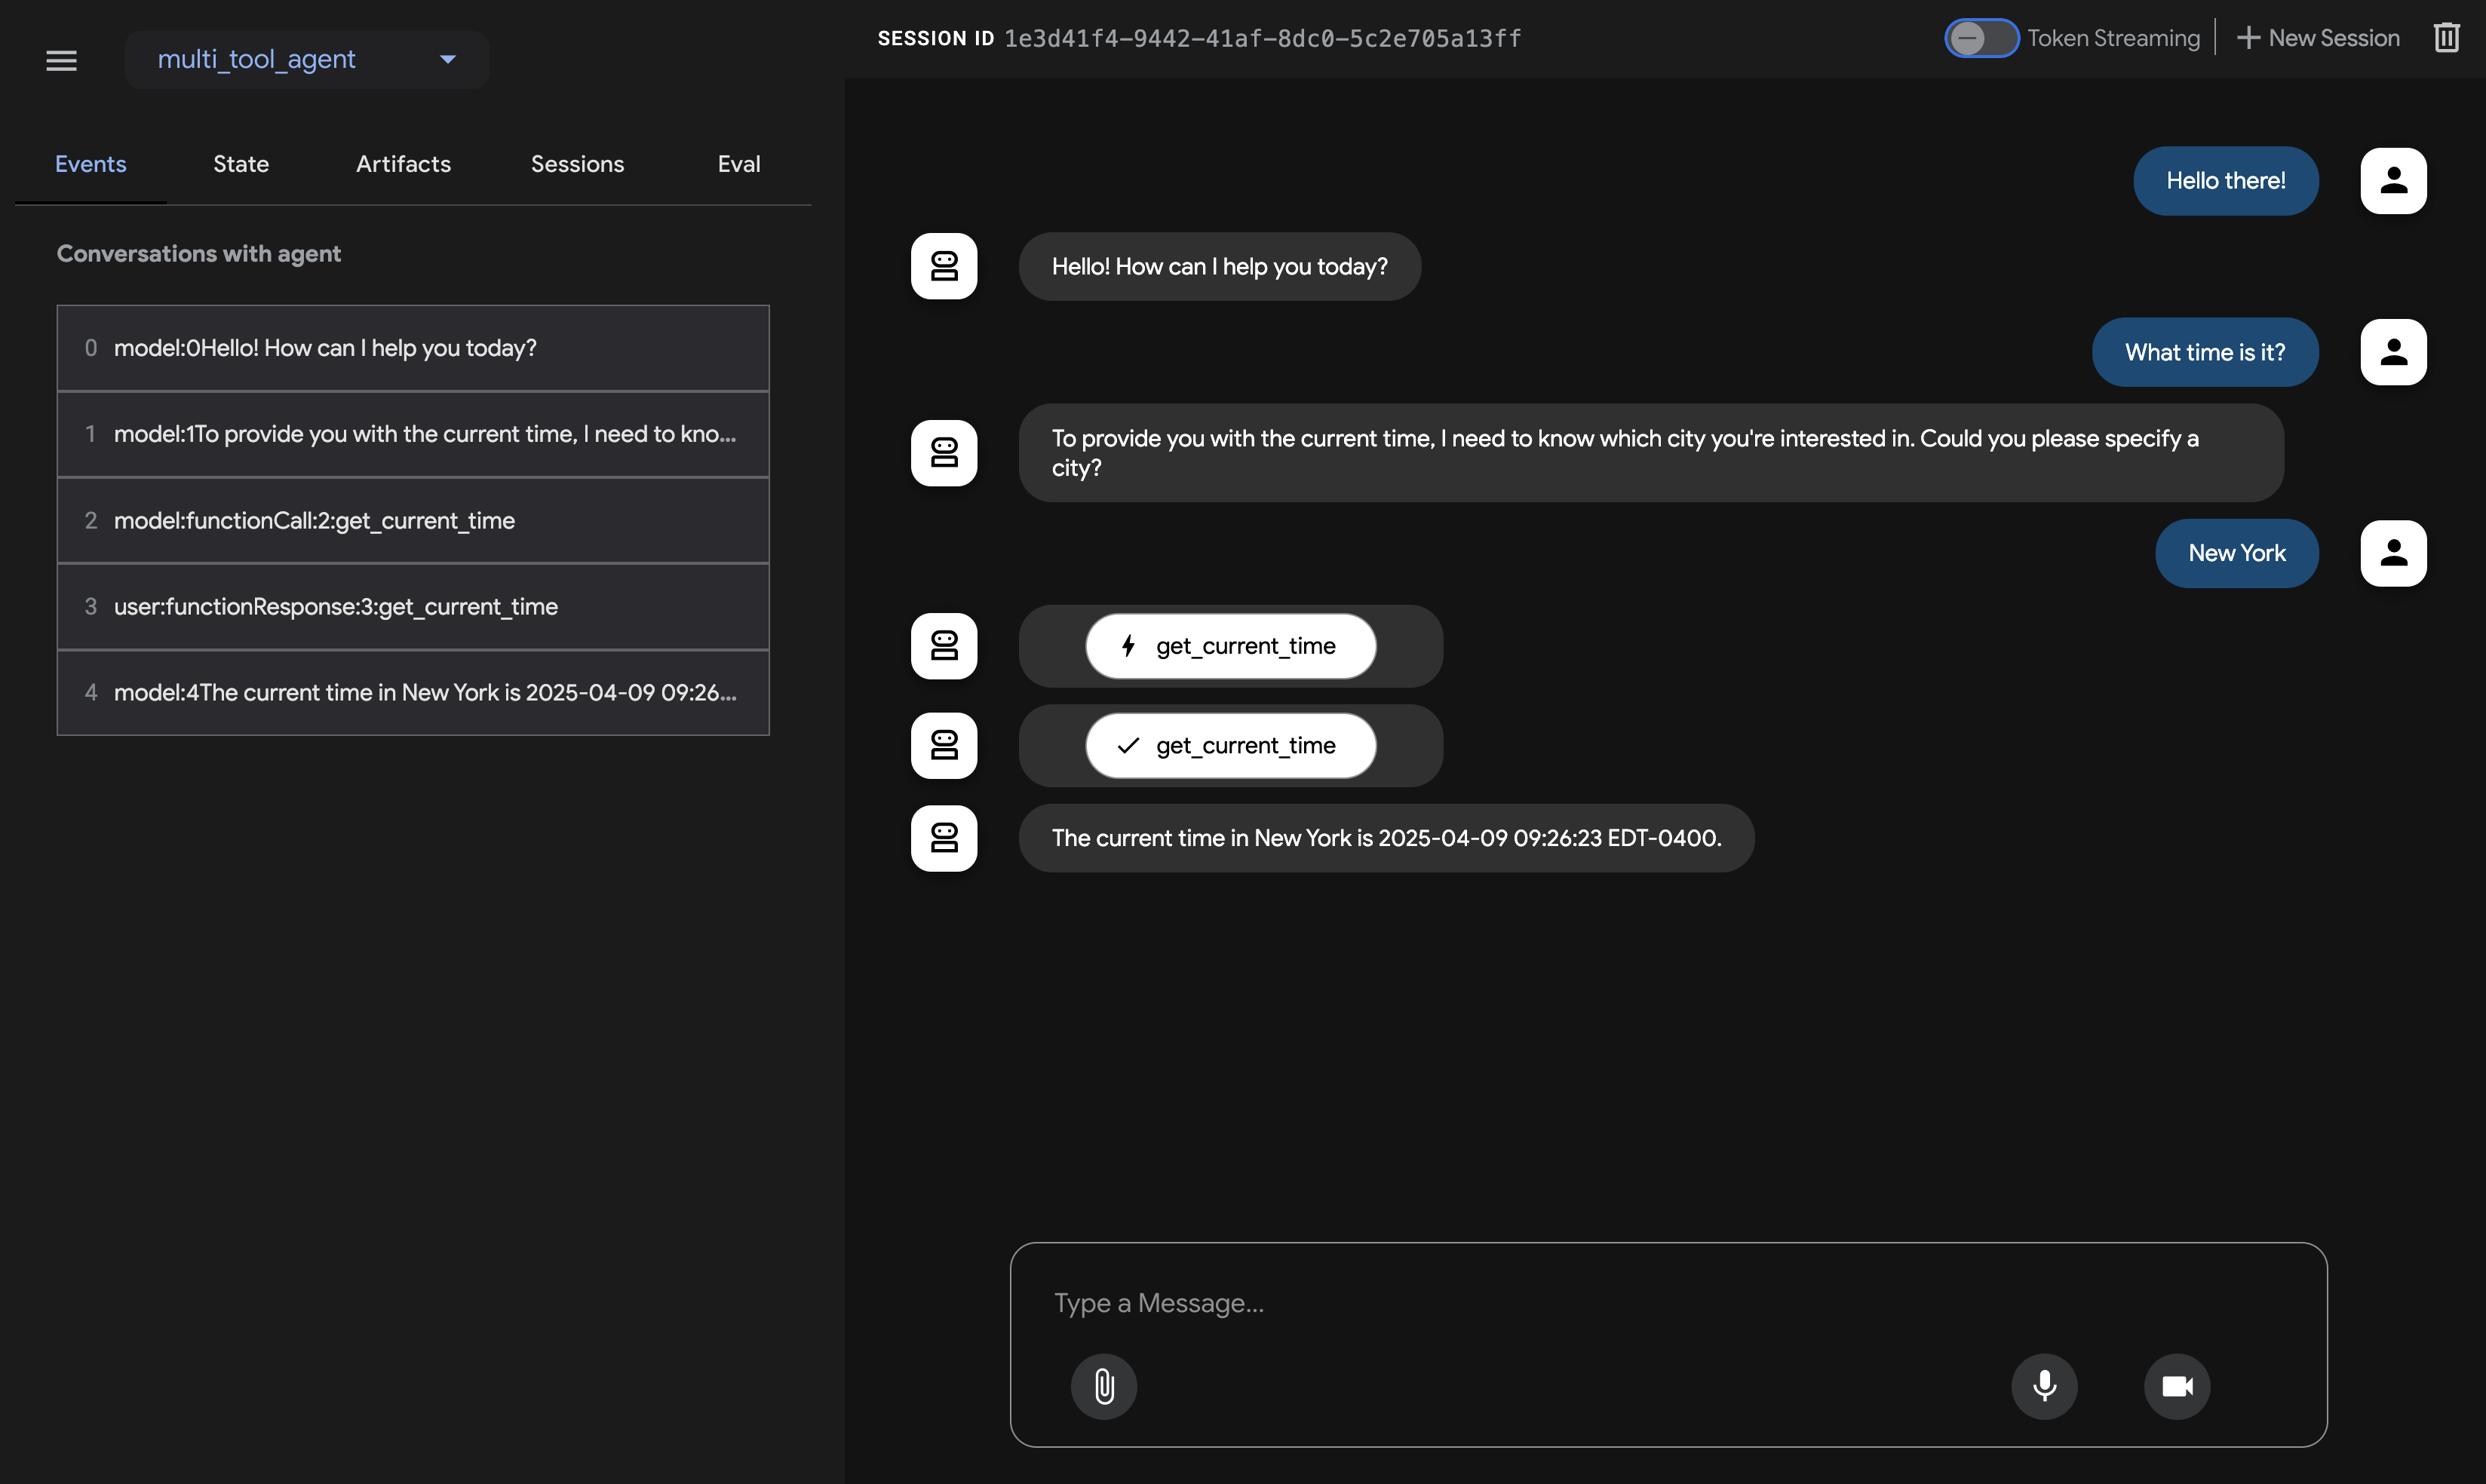
此命令启动一个带有智能体聊天界面的 Web 服务器。你可以在 (http://localhost:8080) 访问该 Web 界面。在左上角选择你的智能体并键入请求。
注意:ADK Web 仅限开发使用
ADK Web 不适用于生产部署。你应该仅将 ADK Web 用于开发和调试目的。
下一步:构建你的智能体
现在你已经安装了 ADK 并运行了你的第一个智能体,尝试使用我们的构建指南来构建你自己的智能体: